Build a Mini Ping Pong Ball Launcher
Build a simple ping pong ball launcher using an Arduino, two DC motors, and an L298N motor driver.
This launcher may not send the ball very far, but that is part of the fun. The goal is to experiment with motor speed, direction, positioning, and launcher design.
Group Photos and Memories
Add group photos here with permission from everyone pictured.
Memories
Add a few notes after the class.
- What made everyone laugh?
- What launcher design worked best?
- Did anyone find a surprising way to improve the distance?
- What would we change next time?
Project Photo
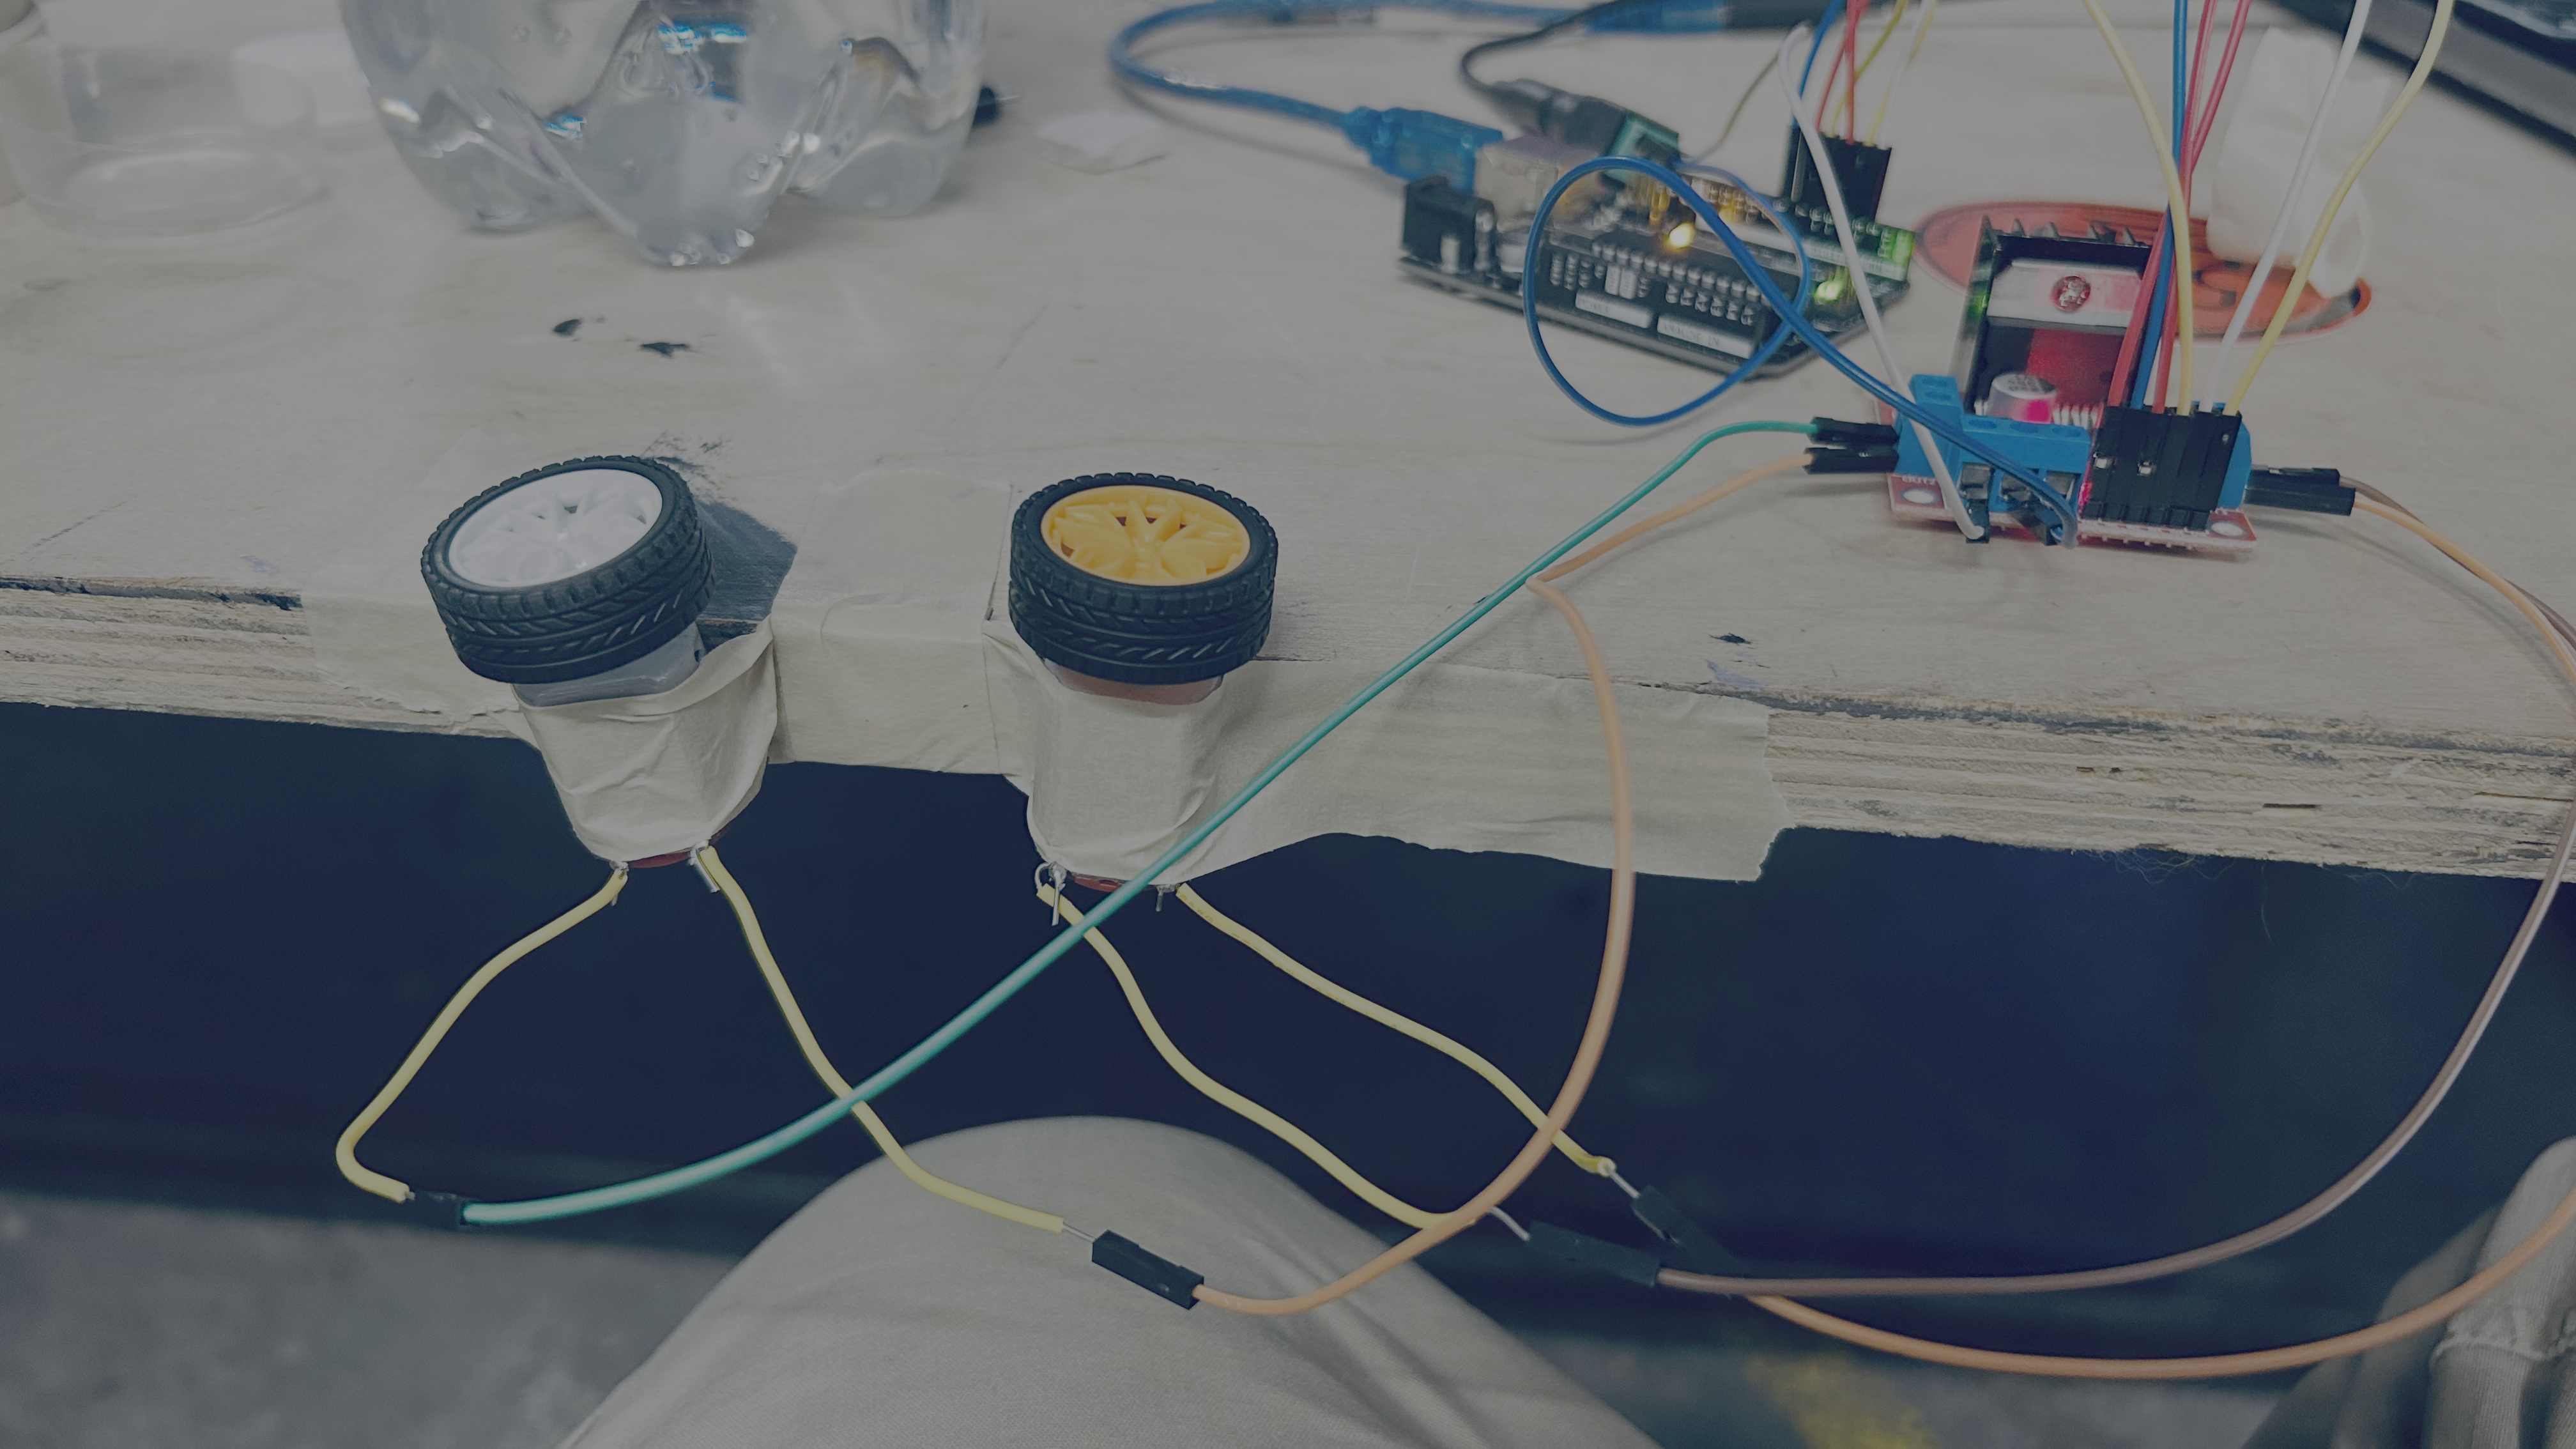
Video
What It Does
Two spinning motors grip the sides of a ping pong ball and launch it forward.
The Arduino controls the motors through an L298N motor driver. Commands sent through the Serial Monitor control:
- Which motor runs
- The motor direction
- The motor speed
- When both motors stop
Components
- Arduino Uno
- L298N motor driver
- Two small DC motors
- Ping pong balls
- Jumper wires
- Motor power supply
Wiring
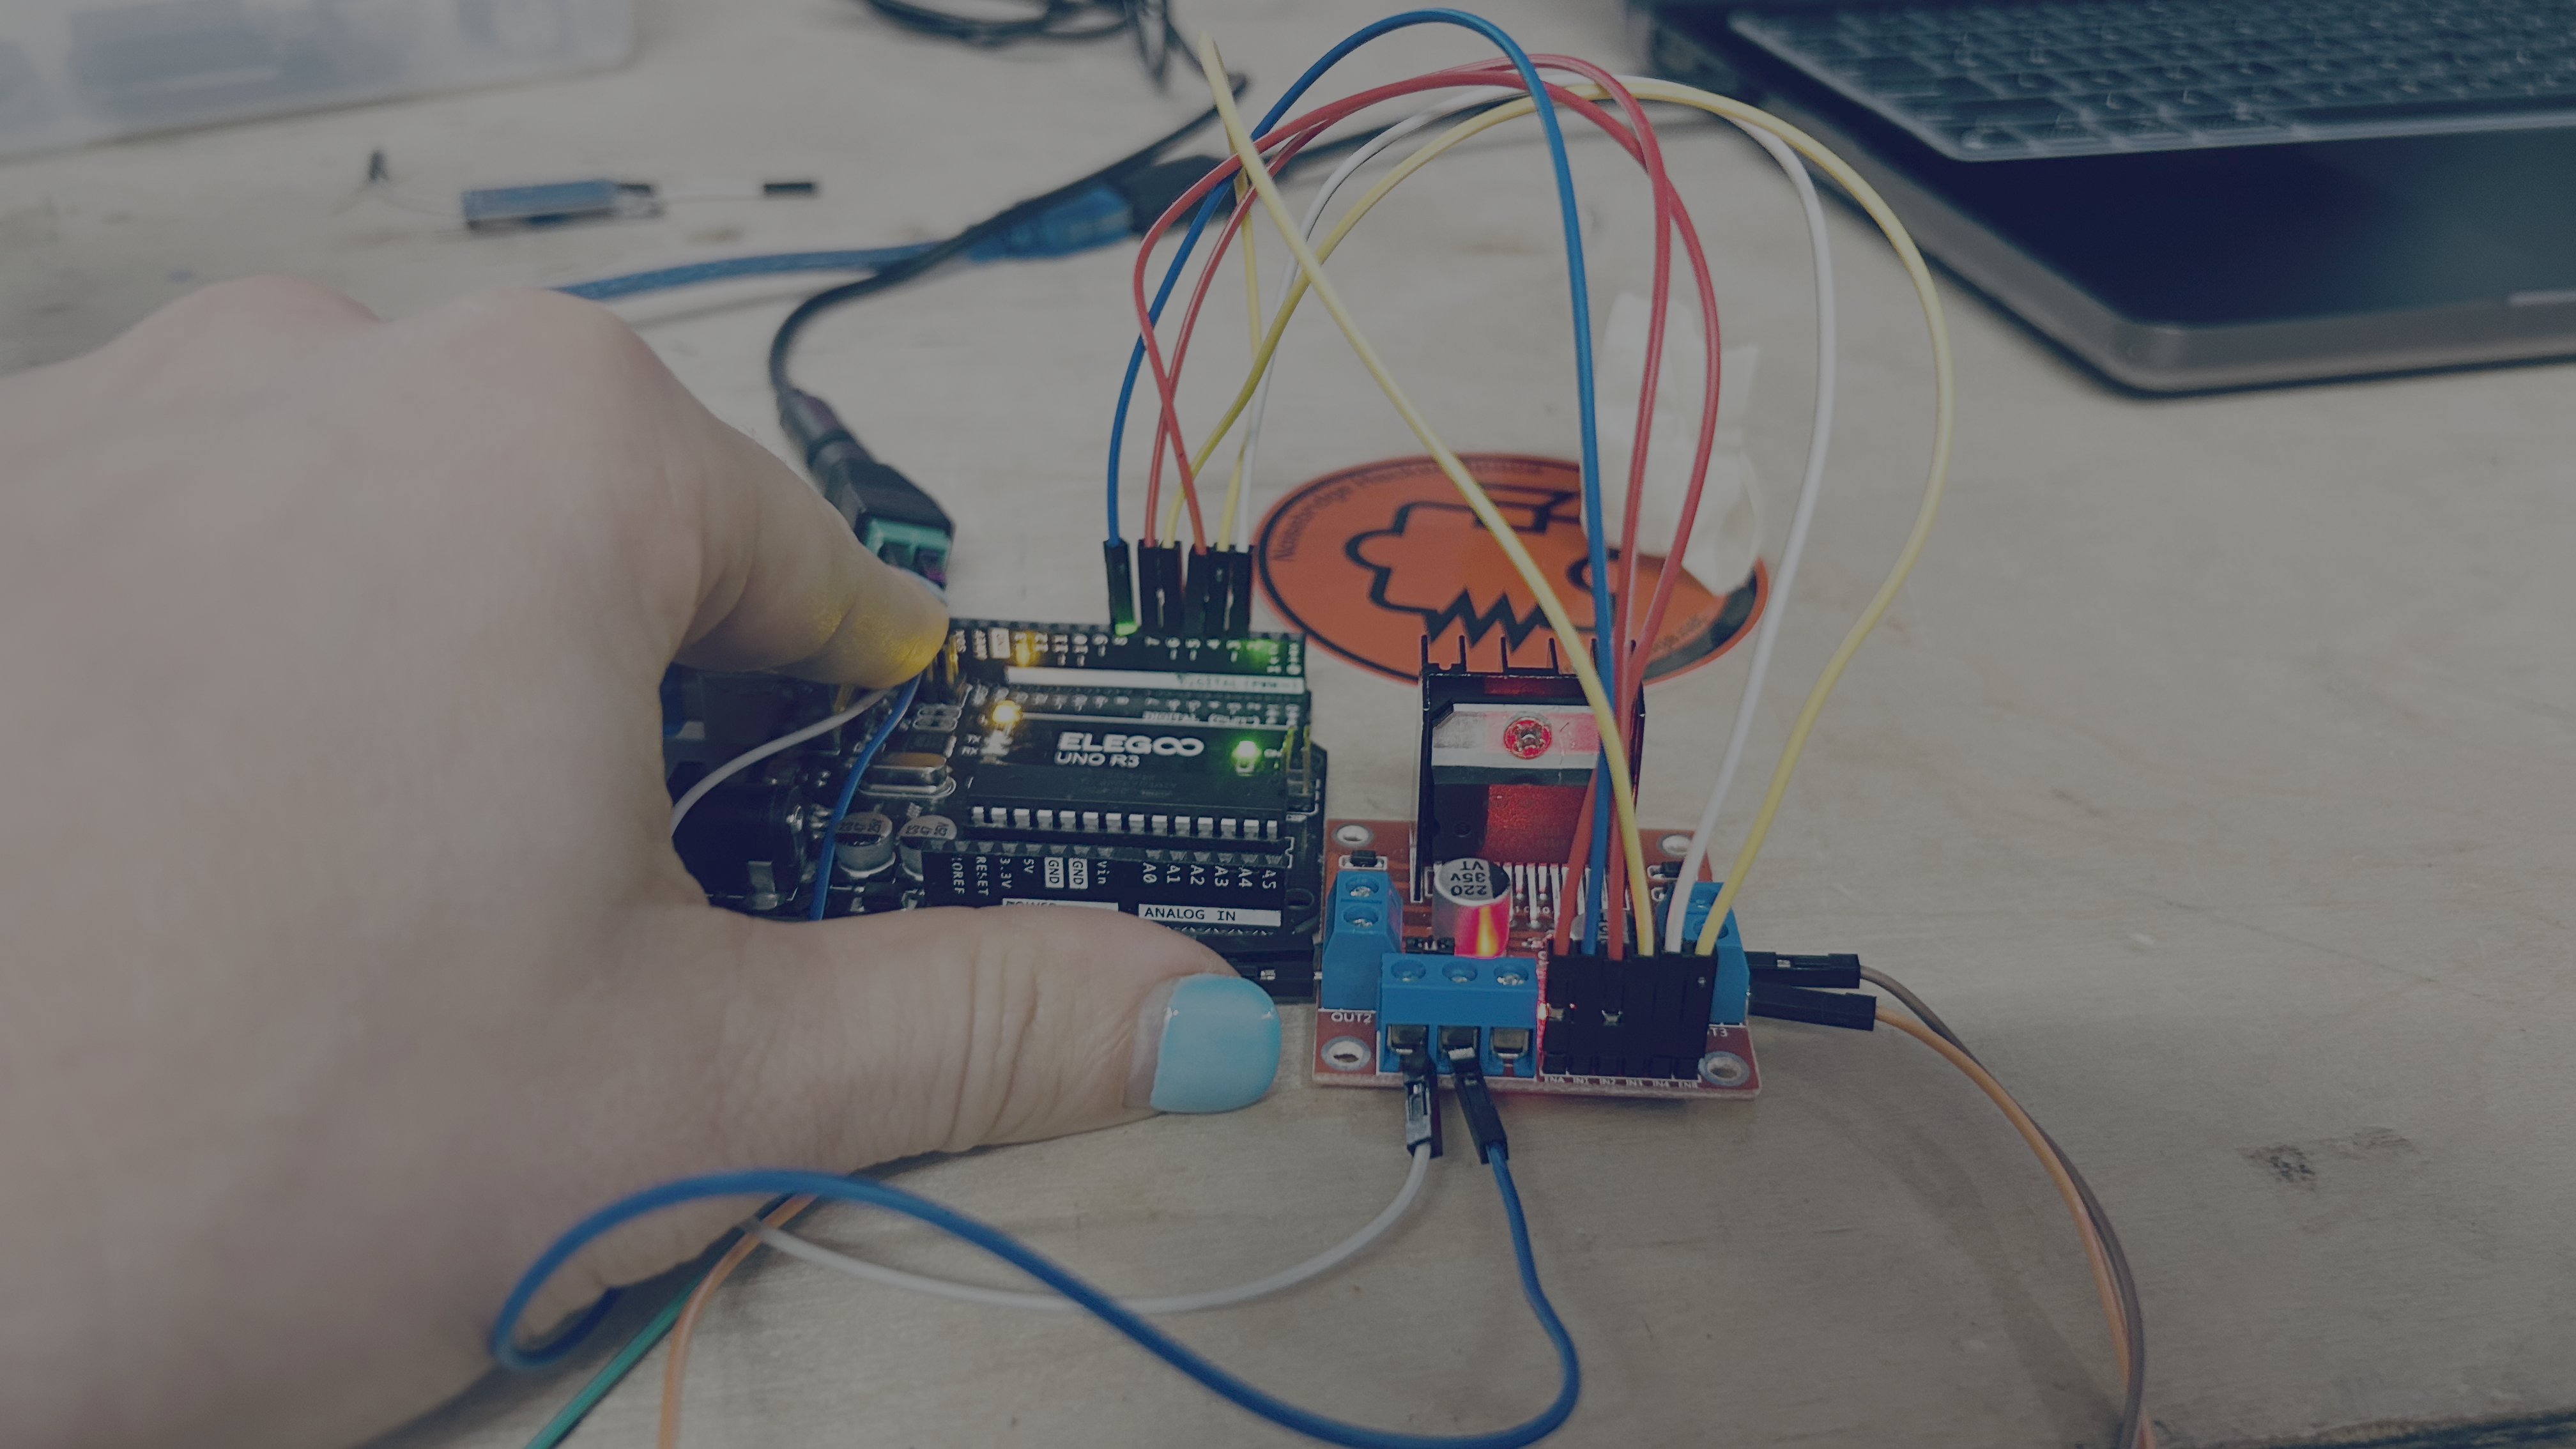
Arduino to L298N
| Arduino Pin | L298N Pin | Purpose |
|---|---|---|
| 5 | ENA | Motor 1 speed |
| 8 | IN1 | Motor 1 direction |
| 7 | IN2 | Motor 1 direction |
| 6 | ENB | Motor 2 speed |
| 4 | IN3 | Motor 2 direction |
| 3 | IN4 | Motor 2 direction |
| GND | GND | Common ground |
Motors
| L298N Output | Connection |
|---|---|
| OUT1 and OUT2 | Motor 1 |
| OUT3 and OUT4 | Motor 2 |
Connect the external motor power source to the L298N motor power input.
Make sure the Arduino and L298N share a common ground.
How It Works
The L298N is a dual motor driver. It allows the Arduino to control two DC motors without powering them directly from the Arduino pins.
Each motor uses:
- Two direction pins
- One enable pin for speed control
The Arduino uses PWM values from 0 to 255 to control motor speed.
0means stopped.255means full speed.
Serial Commands
Set the Serial Monitor baud rate to:
115200
Set the line ending to:
Newline
Example commands:
M1 CW 200
M1 CCW 150
M2 CW 255
M2 CCW 200
M1 STOP
M2 STOP
STOP
Command Format
MOTOR DIRECTION SPEED
Example:
M1 CW 200
This tells Motor 1 to rotate clockwise at a speed of 200.
Arduino Code
const int ENA = 5;
const int IN1 = 8;
const int IN2 = 7;

const int ENB = 6;
const int IN3 = 4;
const int IN4 = 3;

String command;

void setup() {
  Serial.begin(115200);

  pinMode(ENA, OUTPUT);
  pinMode(IN1, OUTPUT);
  pinMode(IN2, OUTPUT);

  pinMode(ENB, OUTPUT);
  pinMode(IN3, OUTPUT);
  pinMode(IN4, OUTPUT);

  stopAll();

  Serial.println("Ready");
  Serial.println("Examples:");
  Serial.println("M1 CW 200");
  Serial.println("M1 CCW 150");
  Serial.println("M2 CW 255");
  Serial.println("M2 STOP");
  Serial.println("STOP");
}

void loop() {
  if (Serial.available()) {
    command = Serial.readStringUntil('\n');
    command.trim();

    processCommand(command);
  }
}

void processCommand(String cmd) {
  if (cmd == "STOP") {
    stopAll();
    return;
  }

  int firstSpace = cmd.indexOf(' ');
  int secondSpace = cmd.indexOf(' ', firstSpace + 1);

  if (firstSpace == -1) {
    return;
  }

  String motor = cmd.substring(0, firstSpace);

  String direction;
  int speed = 0;

  if (secondSpace == -1) {
    direction = cmd.substring(firstSpace + 1);
  } else {
    direction = cmd.substring(firstSpace + 1, secondSpace);
    speed = cmd.substring(secondSpace + 1).toInt();
    speed = constrain(speed, 0, 255);
  }

  if (motor == "M1") {
    runMotor(ENA, IN1, IN2, direction, speed);
  } else if (motor == "M2") {
    runMotor(ENB, IN3, IN4, direction, speed);
  }
}

void runMotor(
  int enablePin,
  int pin1,
  int pin2,
  String direction,
  int speed
) {
  if (direction == "CW") {
    digitalWrite(pin1, HIGH);
    digitalWrite(pin2, LOW);
    analogWrite(enablePin, speed);
  } else if (direction == "CCW") {
    digitalWrite(pin1, LOW);
    digitalWrite(pin2, HIGH);
    analogWrite(enablePin, speed);
  } else if (direction == "STOP") {
    analogWrite(enablePin, 0);
  }
}

void stopAll() {
  analogWrite(ENA, 0);
  analogWrite(ENB, 0);
}
Try It!
Open the Serial Monitor and set the baud rate to 115200.
Start by entering:
M1 CW 100
M2 CCW 100
If the ping pong ball does not launch, don't worry! Every launcher is built a little differently.
Try experimenting with:
- Changing the motor speed (
100,150,200,255) - Switching
CWtoCCW - Moving the motors closer together or farther apart
- Adjusting the angle of the motors
Part of the fun is finding the combination that works best for your launcher.